Using the Bitnami LAMP stack on AWS to host WebAgent Navigator
I had WebAgent running on a shared, hosted LAMP (Linux, Apache, MySQL, PHP) platform which, for testing and development, was almost adequate. Almost in that I could get things done but it was slow and sometimes frustrating. It was not suitable to expose to potential customers for a demo or trial, so I started looking for alternatives.
I considered hosting it on my own server; I looked at other hosting services, both shared and dedicated; I looked at Google Cloud Platform; then at Amazon Web Services. AWS looked to be the best fit for my needs and budget, although I’m sure I could achieve similar results with Google’s services. I was also, at the time, interested in exploring Amazon Connect and I thought it best to stick to one platform.
I’m not a Linux server guy. I know a little and can fumble my way around to get things done but I don’t want to spend an inordinate amount of time at the Linux command prompt. So I took to the AWS Marketplace to seek out an Amazon Machine Image (AMI) that I could use for WebAgent.
Bitnami has many other machine images for both AWS and Google - https://bitnami.com/stacks
What I landed on was “LAMP Certified by Bitnami”. There are other alternatives that may work just as well but the Bitnami AMI looked to me to be easy and inexpensive. It includes the LAMP stack that I need, phpMyAdmin for administering MySQL databases, and good documentation and support.
The setup is super simple. The only mistakes I made were choosing the “T3” EC2 instance which doesn’t qualify for the AWS Free Tier and allocating a larger storage partition than needed (30GiB rather than 10). After I had this running for a few days, I went back and did it over using a “T2.micro” instance, which does qualify for the free tier.
This is what it takes to get it started from the Bitnami AMI page…

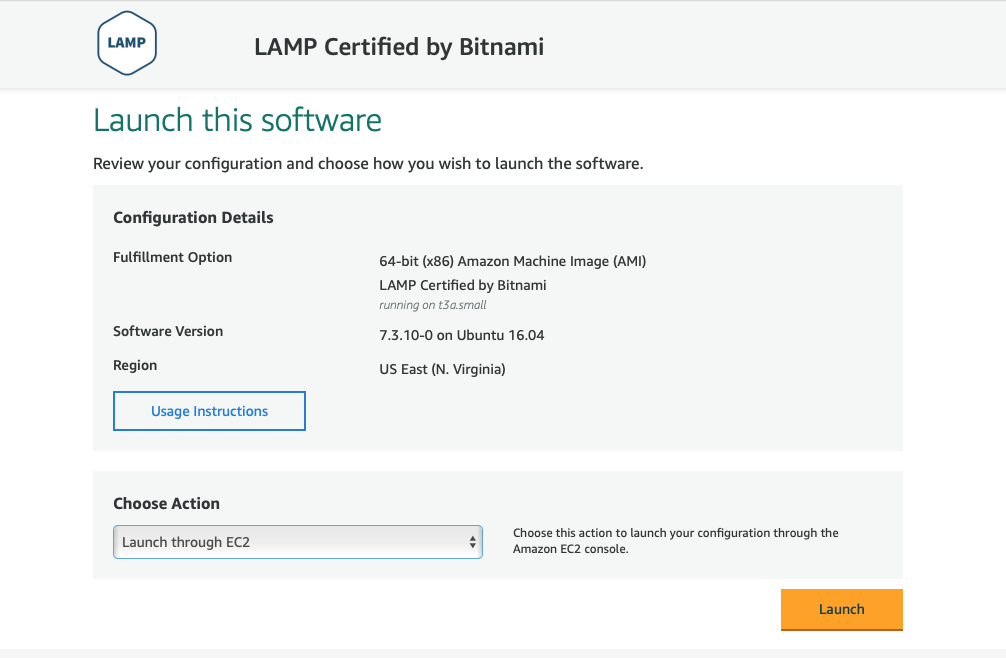
Fulfillment Option has only one choice.
Software Version - you’ll want the most recent version.
Region is the Amazon region you’ll be running in.
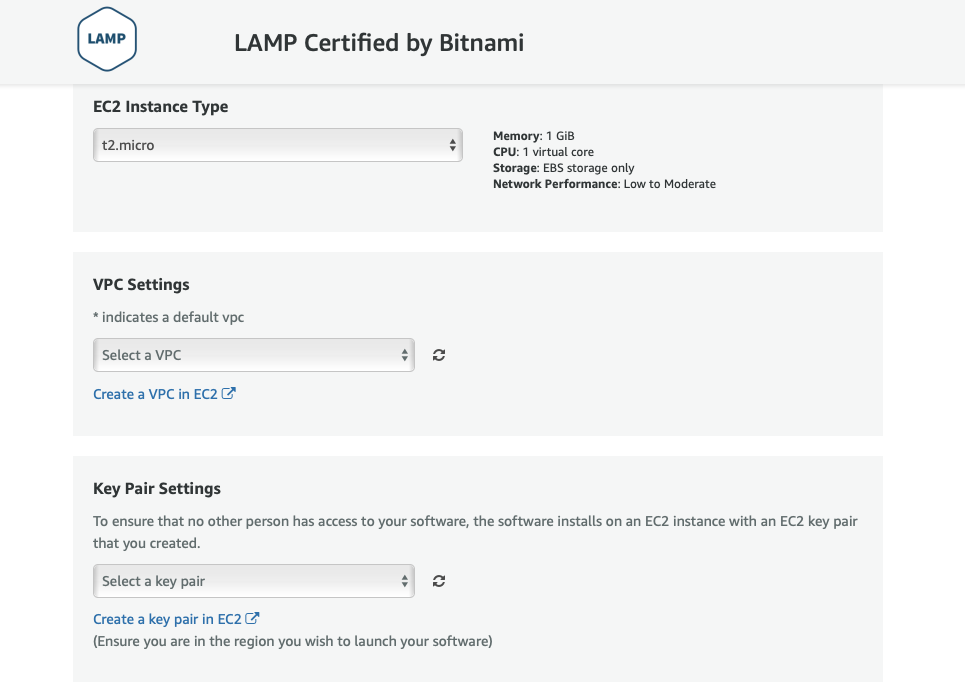
You can choose to launch from the website or through EC2. In either case, you’ll need to select your EC2 Instance Type (in my case “T2.micro”). Make sure you select the right instance type. You can easily upgrade to a larger instance but you cannot downgrade. You will also need to create (or select) a VPC (Virtual Private Cloud) with a subnet and a security group, and a key pair. All of which can be done through the web site or through ECS. When done through the web site, the security group can be created “based on seller settings” which is what I chose. The security group should allow inbound access to HTTP, HTTPS, MySQL, and SSH.
You’ll also want to take note of the “usage instructions” on this page.
Once you’re ready, click the “Launch” button and in a few minutes your instance will be running.
The first thing I wanted to do was assign a permanent IP address rather than the one Amazon assigns when launched. You do this through the AWS Console by selecting your EC2 instance, releasing the IP assigned and then allocating an “Elastic IP” to the instance. Select your instance, then “Actions -> Networking -> Manage IP Addresses”.
Next, you’ll want to update your DNS settings to give your new instance a public domain name (although you can use the rather cryptic name Amazon assigns). You may need to register a domain and create a DNS zone or simply update your current DNS records. You can do all of this through Amazon Route 53 or through a registrar of your choosing.
HOST        TTL     TYPE    IP
@           86400   IN  A   <your Elastic IP address>
www         86400   IN  A   <your Elastic IP address>
Lastly, you’ll probably want SSH (command line) and SFTP (file transfer) access to the server instance. You’ll need to download the keys you created when launching the instance and setup your terminal program and FTP software accordingly. See this page for instructions: https://docs.bitnami.com/aws/faq/get-started/connect-ssh/
I’m using a Mac computer so I downloaded the .pem file to the hidden “.ssh” folder, then created a “WebAgent_ssh.command” file that contains this…
ssh -i ~/.ssh/mykeyfile.pem bitnami@ec2-x-xxx-xx-xxx.compute-1.amazonaws.com
⬅︎ mykeyfile.pem is the key file I downloaded, bitnami is the SSH username, and ec2-x-xxx-xx-xxx.compute-1.amazonaws.com is the EC2 Public DNS name (x-xxx-xx-xxx being the IP address).
When I open “WebAgent_ssh.command”, a terminal session is started and I have command-line access to the web server.
There are special instructions for accessing phpMyAdmin on the Bitnami server…
Connect To PhpMyAdmin
For security reasons, phpMyAdmin is accessible only when using 127.0.0.1 as the hostname. To access it from a remote system, you must create an SSH tunnel that routes requests to the Web server from 127.0.0.1. This implies that you must be able to connect to your server over SSH in order to access these applications remotely.https://docs.bitnami.com/general/faq/get-started/access-phpmyadmin/
So I also created a “WebAgent_ssh_tunnel.command” file that allows me to access phpMyAdmin from my computer…
ssh -N -L 8888:127.0.0.1:80 -i ~/.ssh/mykeyfile.pem bitnami@ec2-x-xxx-xx-xxx.compute-1.amazonaws.com
I run “WebAgent_ssh_tunnel.command” then open http://127.0.0.1:8888/phpmyadmin/ in my browser to access the phpMyAdmin instance on the server.
For FTP access, I use Transmit from Panic Software. SFTP is File Transfer Protocol over SSH so it uses the same SSH port and key as your terminal/command-line access. Bitnami has app-specific instructions here: https://docs.bitnami.com/aws/faq/administration/upload-files/
The protocol is SFTP.
The address is your EC2 instance Public DNS name (e.g.ec2-x-xxx-xx-xxx.compute-1.amazonaws.com)
The port is 22.
The user name is “Bitnami” (or “ubuntu”).
The Key is the key file you downloaded.
The remote path is /home/bitnami/htdocs
this is the default web site path, additional apps (like phpMyAdmin) may be in /home/bitnami/apps.
As I said above, you’ll want to take note of the usage instructions. Specifically, you need to get your credentials for the instance you created. They are in a log file that is only available for 24 hours. See this page for instructions: https://docs.bitnami.com/aws/faq/get-started/find-credentials/ .
Then check the “Getting Started” page here: https://docs.bitnami.com/aws/faq/get-started/ where you’ll find instructions for connecting through SSH, connecting to your database, and pretty much anything else you’ll need to know.
I know I left out some details here but it really is easy to get a web server up and running, in a matter of minutes, using Amazon Web Services and Bitnami AMIs. And, if you do something wrong, delete your instance and start over.
I’ll write more later on installing the web site and database, installing QueueMetrics, using Amazon RDS, and more.